
Getting the Most out of Your TetherBoost Pro
© Tether Tools
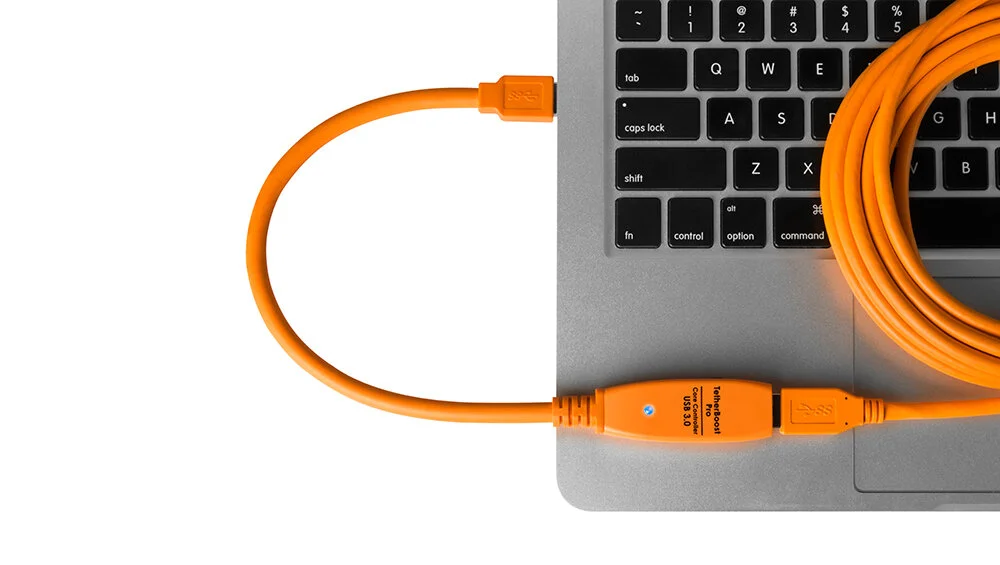
If you regularly shoot tethered, at this point you may know about the TetherBoost Core Controller from Tether Tools, a nifty device that helps maintain a stable tethered connection with USB 3.0 cameras over longer cable runs. I have had great results with the TetherBoost since I added it to my tethered workflow when it debuted in 2015, and the newer Pro version has solved a number of my complaints about the form factor of the original TetherBoost. While the TetherBoost has become an essential accessory for any digi tech (I carry 4 in my kit) and solves many of the problems associated with tethering USB 3.0 cameras, if used incorrectly, it can yield some undesirable results and occasionally cause more problems than it solves. This article aims to address some common issues and best practices when using this powerful tool as part of your digital workflow.

When and Why is the TetherBoost Necessary?
If you're using a USB 2.0 equipped camera like the Canon 5D Mark III or Sonly A7 series, then the TetherBoost won't be necessary at all. USB 2.0 cables carry a maximum of 500mA of current which is easily provided by even the weaker USB ports on a MacBook Pro or iMac. Modern cameras like the Nikon D810, Canon 5D Mark IV, and Phase One IQ series that use USB 3.0 for tethering present a new issue. Unlike USB 2.0, USB 3.0 devices can draw a maximum of 900mA of current.
This is no problem for the more robust ports on a Mac Pro or PC workstation, but the USB ports on MacBook Pros and iMacs do not offer the same performance. While they can generally supply enough current to sustain a connection with a standard 15 foot tether cable, the same cannot be said for longer cable runs. That's where the TetherBoost comes in.
For DSLR cameras that use the USB 3.0 Micro-B Connection like the Canon 5D Mark IV, 5DS and Nikon D810, my experience has shown that a TetherBoost setup is required in order to use cables longer than 15 feet when tethering with a MacBook Pro. I always set it up at the beginning of the day rather than stopping to reconfigure the cable path after the first or second dropped connection. I like to use the TetherBoost when tethering to my Mac Pro as well, just to be safe.
Though an external power source is not required in order to take advantage of the benefits of the TetherBoost, I have found it to add quite a bit of stability when used in conjunction with cameras that utilize a USB 3.0 Micro-B connection. More on that in a bit.
On the other hand, digital backs like the Phase One IQ3 series which utilize the more robust USB 3.0 type B connection, combined with better power management and native communication with Capture One, provide for a more stable tethered connection even with the MacBook Pro's weaker USB ports. This means that adding the TetherBoost to the signal chain is not strictly necessary with cables up to 30 feet, and can occasionally even introduce new tethering issues.
However, the need for the TetherBoost can vary depending on the specific camera and computer combination you are using. While I've had excellent results running an un-boosted 30 foot cable from the IQ3 50MP back to a MacBook Pro, the same cannot be said for the IQ3 100MP back due to its larger file size.
It's always a good idea to perform a "stress test" on any new camera/computer combination to determine whether or not a TetherBoost will be necessary. Start with a 30 foot cable without the TetherBoost and set your camera to its fastest burst mode. Fire off a number of shots until you reach the limit of the camera's buffer, and make a mental note of how many shots you fired so you can confirm that no frames have been dropped (I like to do this in multiples of 10 for easy counting). Repeat, repeat, repeat.
If you manage to capture 100 or so frames in rapid fire without dropping the connection, you should be good to go, but its a good idea to repeat the test with a TetherBoost to make sure that the connection is equally or more stable with an additional device in the signal chain. Again, its rare, but with certain configurations the TetherBoost will in fact introduce bugs into the connection and cause even more problems, so you want to make sure that this isn't the case with your setup. Occasionally, even the most rigorous stress testing will fail to reveal tethering issues that do eventually pop up on set and require the addition of the TetherBoost, so you want to be certain that it will be a reliable troubleshooting plan if any new issues arise.
Establishing the Proper Signal Chain
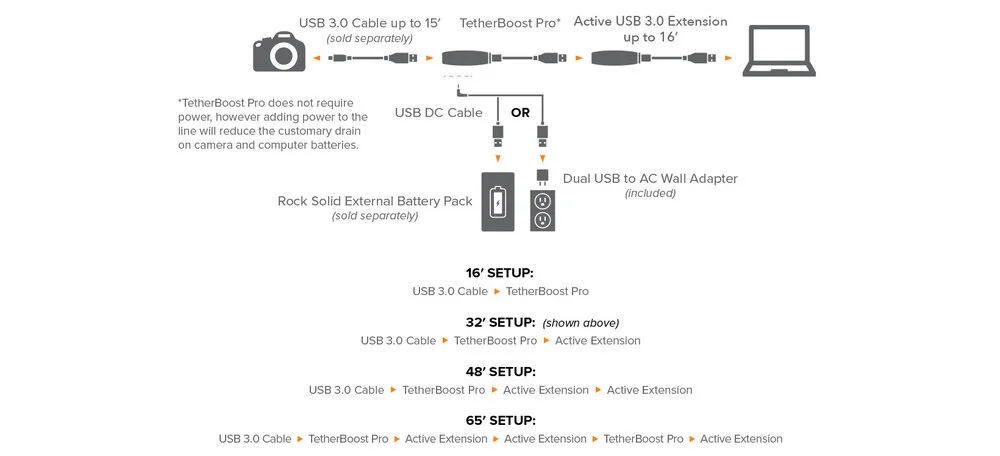
Due to the the form factors of both versions of the TetherBoost, many users assume that it is best to place it last in the signal chain, that is, plugged directly into the computer's USB port followed by a 15 foot extension cable and then a 15 foot tether cable running to the camera. I have found this method to be extremely unreliable, even when powered by an external battery. Despite the extra power the TetherBoost provides, there is simply not enough to reliably run the length of a 30 foot tether cable.
As the diagram above illustrates, the ideal location for the TetherBoost is in the middle of the signal chain, between the 15 foot extension cable and the main tether cable. With the TetherBoost Pro, cables up to 65 feet are officially supported by Tether Tools, though my experience shows that results may vary with cables longer than 32 feet. Note that the TetherBoost should always be placed closest to the camera, and with cables over 48 feet a second TetherBoost is required between the first and second active extension cables. Long cable runs benefit tremendously from (and often require) at least one external power supply.
For shorter cable runs, the TetherBoost is designed to work without external power, simply boosting and stabilizing the amount of current that the camera is requesting from the host. However, most DSLRs always benefit from additional battery or AC power (while other cameras like the Phase One IQ3 100MP back seem to prefer an unpowered TetherBoost). External battery power is especially recommended when working on location in order to minimize draining the laptop's battery.
Though AC Power is an option, there are only a few scenarios where it makes sense: a permanently installed camera setup in a high volume e-commerce or copy stand environment, for instance. Otherwise, a battery makes a lot more sense in order to minimize the need for additional cables.
While the TetherBoost is an extremely useful piece of gear, both versions are somewhat fragile. Unfortunately, they don't fare terribly well when tossed around the floor of a studio or a sidewalk on location without some form of external protection. However, I have created a simple and affordable solution to address this.
How To Build Your Own Self Powered TetherBoost Protector
With the original TetherBoost core controller, the most common setup was a Tether Tools Strapmoore Extender wrapped around the TetherBoost and a bulky but powerful external battery. While this setup was fairly well suited to the studio environment if treated with care, it was not rugged enough to withstand the rigors of location shooting.
The design of the newer TetherBoost Pro, however, makes for a great platform to build off of. The small size and dongle form factor mean that it is easy to build a robust self powered case that allows for the TetherBoost to be used in the middle of the signal chain where it belongs. The best part: it only requires three off the shelf parts and costs less than $30.
Here's what you'll need:
Anker Astro E1 6700mAh Battery (One will last all day, but buy a backup to be safe!)
Tether Tools JerkStopper Extension Lock (Included free with TetherBoost Pro)
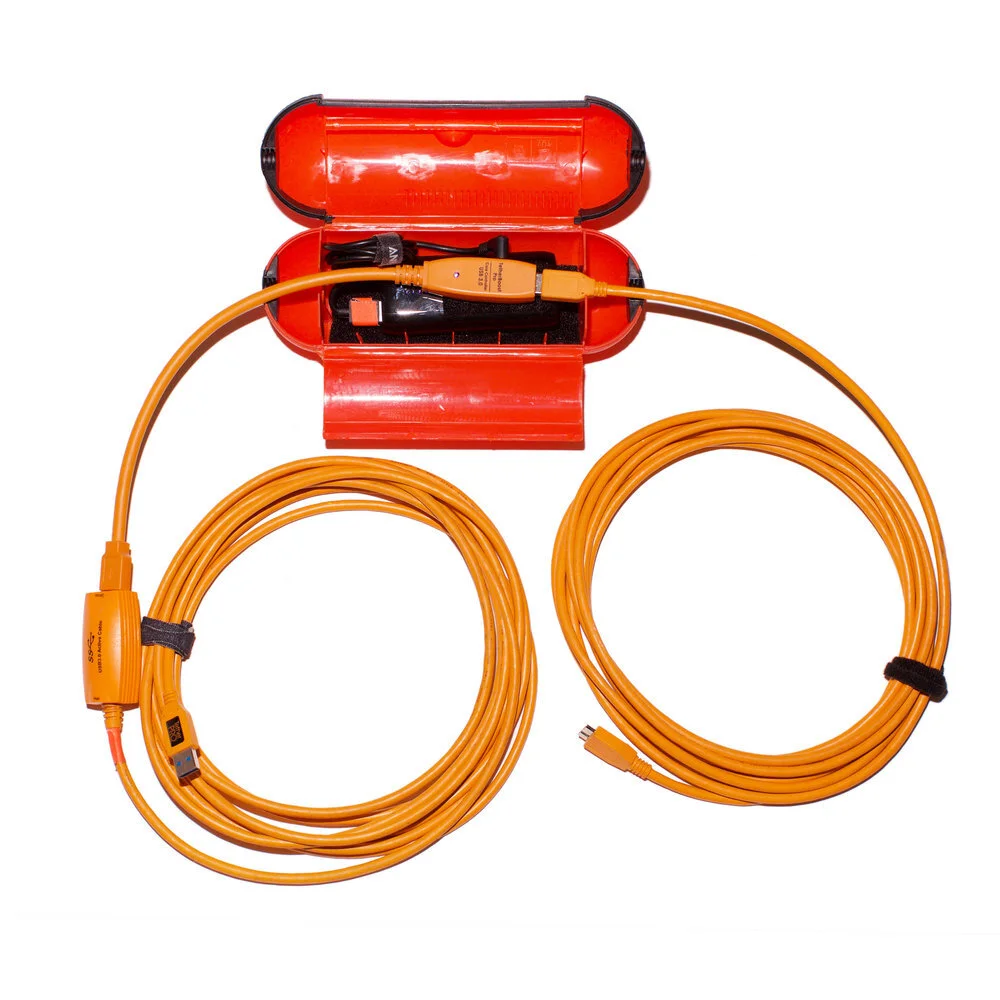
Assembly is very straightforward. Simply attach a strip of loop (soft) side Velcro to the interior base of the extension cord protector and another small piece to the top side of the battery (be sure not to cover the capacity indicator lights), and then attach strips of hook side (rough) Velcro to the base of the battery and the under side of the TetherBoost. The cord protector includes a piece that is designed to keep the cables connected, however this build makes it incompatible and obsolete, so it can be discarded.
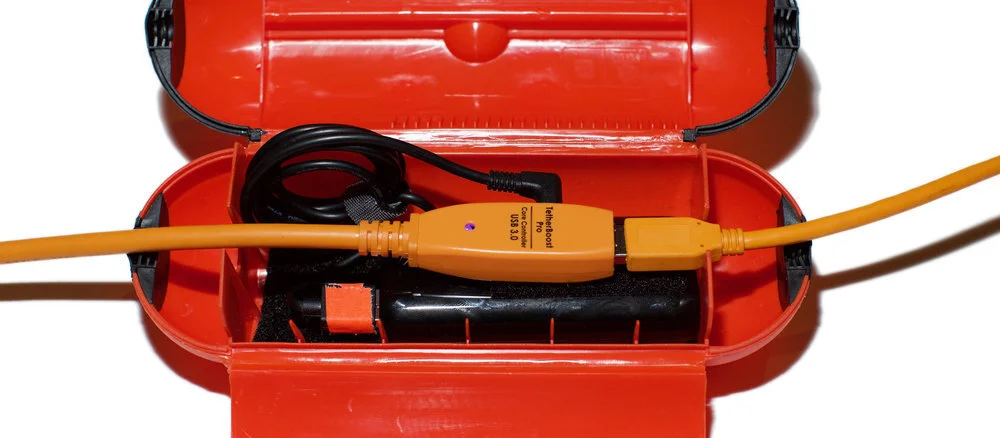
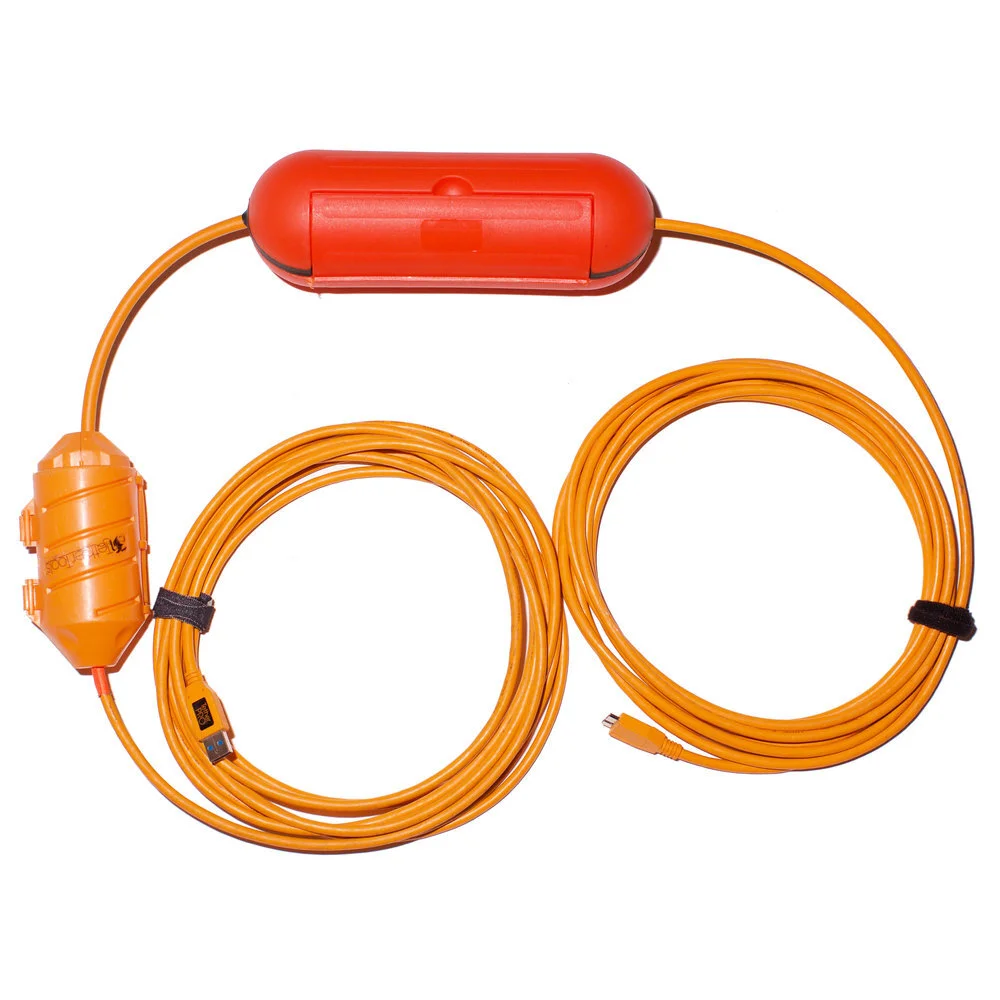
Attach the TetherBoost to the top of the battery, and then place the whole unit inside the cable protector and attach the power cord. Be sure to press the button on the side of the battery to activate the power. Connect your TetherBoost to the active extension cable and your tether cable and close the unit. It's also a good idea to use the included Tether Tools extension lock between the female end of the extension and male TetherBoost connection. While both of these cases do provide some protection against cables becoming disconnected, it is always wise to use gaffer tape to ensure the tightest connection possible.
This setup really shines on location. It's withstood pouring rain and been dragged around New York City sidewalks for hours on end. Mine is still going strong after 6 months of heavy use, and I recently built a second setup so that I can have a backup ready to go in case of failure.
Final Thoughts
The TetherBoost Core Controller has proven itself to be an essential tool for digital techs and tethered shooters, and the new Pro version has addressed most of the shortcomings of the original version. However, it does require a bit of testing in order to figure out the best setups for specific camera and computer combinations. That said, I can't recommend it enough! If the TetherBoost isn't already part of your toolkit, you should definitely consider putting it at the top of your wishlist!
Note: The views expressed here are my own and are in no way endorsed by or affiliated with Tether Tools. I have personally purchased all of the mentioned products and have not received any form of compensation for writing this review.